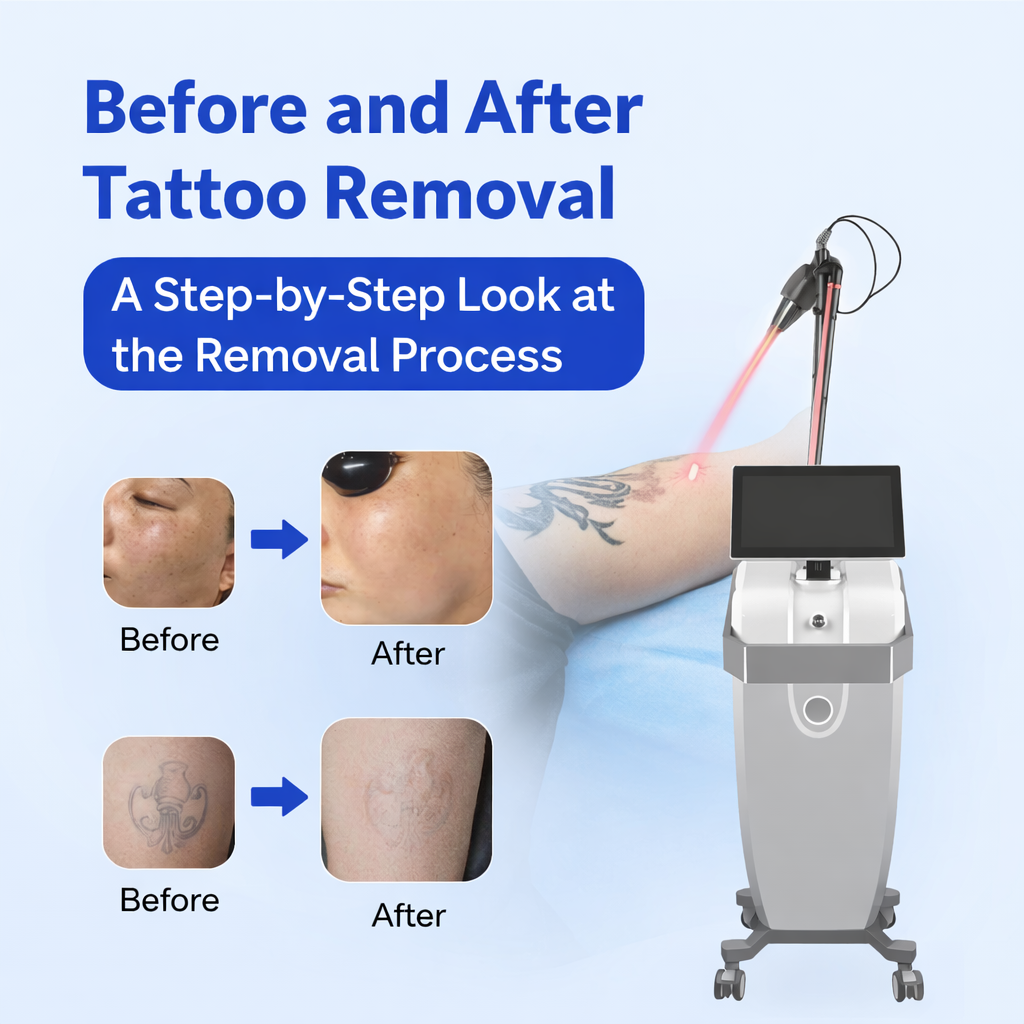
Tattoo removal has become increasingly popular as laser technology continues to improve. Many people search for before and after tattoo removal results to understand how the process works and what kind of transformation they can expect. Modern picosecond and Q-switched laser technologies can significantly fade or completely remove unwanted tattoos through a gradual, multi-session treatment process. These lasers break down tattoo pigments into microscopic particles, allowing the body’s immune system to naturally eliminate them over time. In this guide, we’ll take a step-by-step look at the tattoo removal process, from the initial consultation to the final fading stage, so you can clearly understand what happens before and after tattoo removal.
1. Initial Consultation and Tattoo Assessment
Before starting the tattoo removal process, a professional consultation is necessary. During this step, practitioners evaluate the tattoo and the patient’s skin condition to determine the best treatment plan.
Key factors assessed include:
Tattoo color – Black ink is usually the easiest to remove because it absorbs laser wavelengths more effectively.
Tattoo size and density – Larger and heavily inked tattoos require more sessions.
Tattoo age – Older tattoos often fade faster since some pigment has already degraded naturally.
Skin tone and health – Laser settings must be adjusted carefully for different skin types.
Clinics typically take photographs before treatment to document the before and after tattoo removal progress and evaluate results over time.
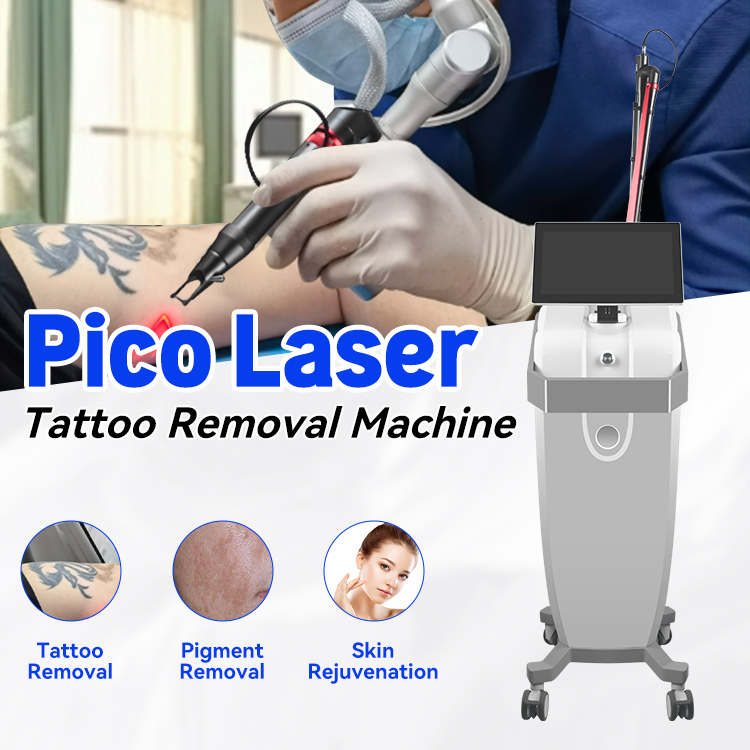
Advanced equipment such as the 1064nm and 532nm dual-wavelength laser system is widely used because it can target different ink colors effectively.
https://shefmon.com/product/a0507-1064nm-532nm-q-switched-super-picosecond-picosure-yag-laser-tattoo-removal/
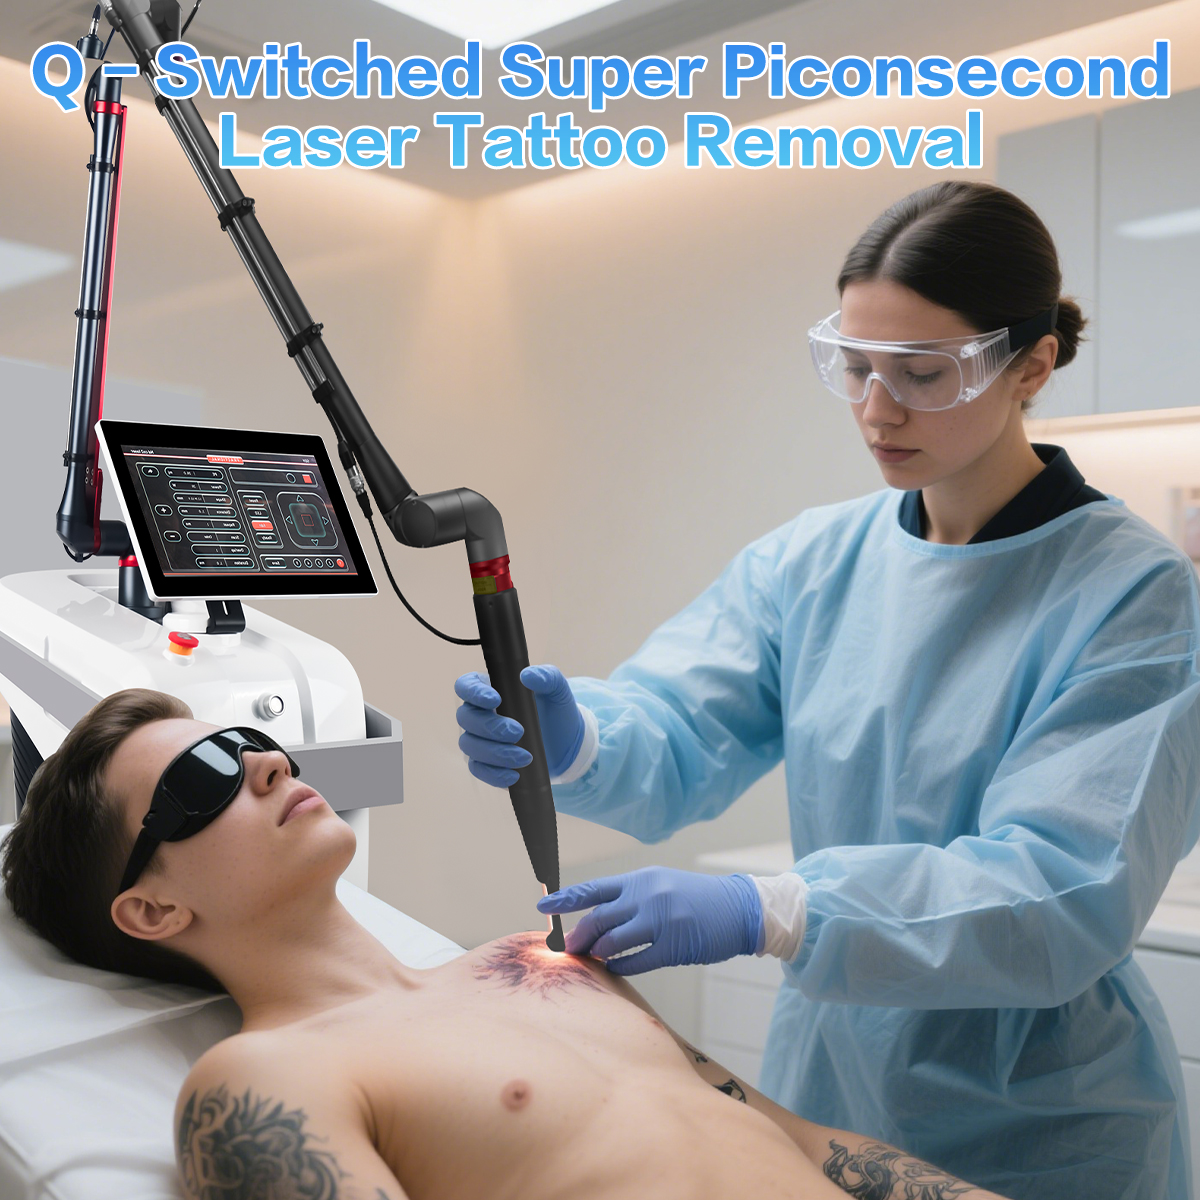
2. Laser Tattoo Removal Treatment Session
Once the treatment plan is established, the actual laser procedure can begin. Each session usually takes 15 à 30 minutes, depending on the tattoo size and complexity.
2.1 How the Laser Works
Laser tattoo removal uses extremely short bursts of energy—often measured in picoseconds—to break down ink particles beneath the skin. The laser targets pigment without significantly damaging surrounding tissue.
When the laser hits the tattoo pigment:
The pigment absorbs the laser energy.
The energy shatters the ink into tiny fragments.
The body gradually removes the fragments through the lymphatic system.
This photoacoustic effect allows modern picosecond lasers to remove tattoos more efficiently while reducing discomfort and skin damage.
2.2 Multiple Wavelengths for Different Colors
Different tattoo colors respond to different laser wavelengths. For example:
1064 nm lasers are effective for dark colors like black and blue.
532 nm lasers work well for red, orange, and warm pigments.
Using a combination of wavelengths improves treatment effectiveness for multi-colored tattoos.
3. Immediate Aftercare Following Treatment
Right after a laser session, the treated area may appear slightly red, swollen, or frosted. This is a normal reaction as the skin begins its healing process.
3.1 First Week After Treatment
During the first week, patients may experience:
Mild swelling or redness
Small blisters or scabs
Temporary skin sensitivity
It is important not to pick or scratch the treated area, as this could cause infection or scarring. Keeping the area clean and protected helps promote healthy healing.
3.2 Proper Aftercare Tips
To support recovery and improve results:
Apply soothing or antibiotic ointment if recommended
Keep the area clean and dry for the first 24–48 hours
Avoid direct sunlight and use sunscreen
Do not scratch or remove scabs prematurely
Following these aftercare guidelines significantly improves the final before and after tattoo removal results.
4. Healing and Fading Between Sessions
Tattoo removal is a gradual process. After each laser session, the body needs time to eliminate fragmented ink particles.
4.1 Chronologie typique de la guérison
The general healing timeline includes:
1–2 weeks: Skin recovers from the laser treatment.
2–6 weeks: The immune system continues removing ink fragments.
6–8 weeks: The skin is ready for the next treatment session.
Because of this biological process, treatments are usually spaced 6 to 8 weeks apart.
4.2 Visible Before and After Progress
Tattoo fading typically follows a gradual pattern:
Session 1–2: Slight fading and lighter outlines
Session 3–5: Noticeable reduction in pigment
Session 6–8: Up to 80–90% tattoo clearance in many cases
Some complex tattoos may require additional sessions depending on ink density and color combinations.
5. Final Before and After Tattoo Removal Results
After completing the recommended sessions, most tattoos fade dramatically or disappear entirely. Clinical studies have shown that picosecond laser systems using 1064 nm and 532 nm wavelengths can achieve significant pigment clearance with minimal long-term side effects.
The final result depends on several factors:
Tattoo color and pigment composition
Depth of ink in the skin
Patient’s immune response
Quality of the laser equipment used
With modern technology, many patients achieve clearer skin and impressive before-and-after transformations.
Conclusion
Understanding the full before and after tattoo removal process helps set realistic expectations for both patients and practitioners. Laser tattoo removal is not an instant procedure—it requires multiple sessions, proper aftercare, and patience. However, thanks to advanced picosecond and dual-wavelength laser technology, the results today are safer, faster, and more effective than ever before. By following a structured treatment plan—from consultation and laser sessions to healing and fading—patients can gradually achieve dramatic tattoo reduction and restore clearer skin.